The Google Chrome update
In an endeavor to provide a safe web browsing experience, Google, from July 2018, started flagging websites and alerting site visitors in case a site does not appear secure because of the absence of HTTPS connection.
This not only initiated fear in visitors for unsecured web browsing experience, especially for eCommerce portals, but also the business owners, as non-compliance with https connection meant lower search engine ranking.
As a solution to this problem, HostGator has been offering free SSL certificates to all its customers.
Understanding HTTPS and SSL
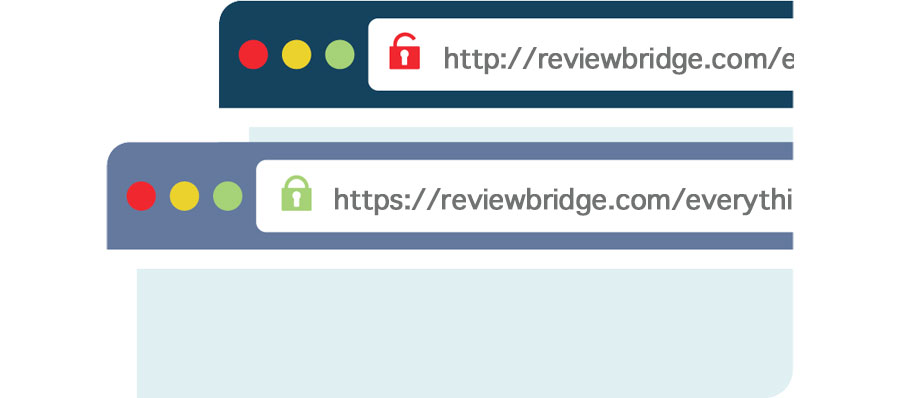
HTTPS (Hyper Text Transfer Protocol Secure) is a protocol which ensures the security for the communication between the browser and the server. Here, S stands for ‘Secure,’ and as the name refers, it works more conveniently than HTTP and provides more protection than that. It does not let any other system or network access your private or confidential data. A website is having SSL certificates appear with https: prefix instead of HTTP:.

» Everything You Need To Know About SSL
SSL (Secure Sockets Layer) is a standard technology which provides excellent protection to the internet connection so that the sensitive data could be secured from hackers and cyber-attacks. It is a type of protocol which ensures the security between two systems working over the internet or any other network.
The importance of SSL
The SSL is one of the highly recommended features today, as it provides security from criminal activities and prevents spammers and hackers from accessing confidential information. SSL encrypts the data which transfer and channelize through various systems from one computer to the destination. In other words, without SSL, the data which transmits from a computer to the target can be accessed by any medium and SSL does not let this happen.
When a website has SSL certificates, a green lock appears on the left side of the address bar which indicates that the site is secured and can be trusted. So, SSL develops trust among users. Also, SSL enabled websites are the primary choice of Google itself as Google changed its algorithm in 2014 to give better search engine ranking to those websites. Apart from that, SSL is one of the 12 primary requirements of Payment Card Industry (PCI) which allows you to transact online only if the website is SSL enabled.
How to activate SSL on your HostGator website
Recently, HostGator announced that their all shared hosting plans will include a new add-on called Let’s Encrypt SSL. Let’s Encrypt allows customers to apply SSL to their websites and it contains various excellent security features and benefits. Along with providing security to the site, it covers all the subdomains also. However, it is straightforward to install the SSL, but the free SSL does not get installed at their own. They need to be installed manually.
So, here, a step by step guide is provided to activate SSL on your HostGator website.
HostGator offers its customers’ websites ready to use SSL that can be proceeded to the next level so that the customers can enjoy the secured version of the site, i.e., HTTPS and in case, the domain name is managed by the other web host, you will need to create an A record for the domain. Without the same, you will not be able to use the free SSL.
After that, you will need to update the .htaccess to apply HTTPS on every page because the free SSL needs to be updated manually as it doesn’t apply HTTPS on the domain automatically.
Now, you need to go to the website to test whether the SSL certificates are working or not. The way is simple if you see HTTPS prefix, all is ok, but if the prefix is still HTTP, the process needs to be rechecked.
Step by Step switch to HostGator
To experience a hassle-free process of switching from one web host to other, one has to follow the way given below: –
First of all, one has to sign up with the new web host without letting the previous hosting company know about the transfer process. Then, a backup of all the files should be made by you to reduce the chances of losing data during the process of connecting old host’s FTP and uploading files by connecting to new host’s FTP.
Third, the database backup should also be made on the old host, and the backup files should be uploaded to the new one. Then, the databases should be restored from the backup files by using SSH.
However, Emails cannot be transferred generally, but those can be done by making archive from the old web host using a POP3 connection.
After that, the domain name’s DNS needs to be changed and then the correct name servers will be provided by the new host, and after getting the correct DNS, you have to contact to the registrar to make the change in your domain name servers. Now, you must wait for approximately 48 hours, and after this period, your site would start loading with the new host only.
Once the two days have passed, the updated DNS will start working entirely, and now, you have to cancel the old hosting account. Now, you are all set to enjoy the services of your new host.


